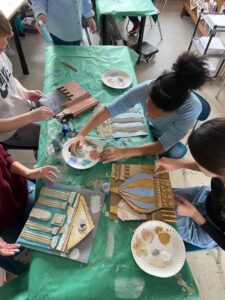
If there’s one thing we all have on hand coming out of the holidays, its PACKAGING! And that doesn’t just mean cardboard boxes- it’s Styrofoam, and bubble wrap, and countless oddly shaped cushioning materials. As a children’s art teacher, I love bringing in heaps of this stuff into the classroom, laying it all out on a table, and setting students loose to see what they can make with it. Using recycled materials lends itself to wonderful open-ended art, with the added bonus of thinking how we can reuse materials in a creative sculptural way. From both a teacher and a mom standpoint, sculpture can have limiting factors due to space, budget, and proper equipment. However, relief sculpture is different. Relief is defined as sculpture designed to be seen from one side only, as opposed to in the round. This project teaches us about this sculptural method and is completely manageable for all skill levels and all ages.
Materials: Flat and corrugated cardboard (one piece set aside to use as a base), drawing paper, a landscape image with both a foreground and background, scissors and/ or a hobby knife (X-acto… adults only), glue, paint or crayon
Directions:
-
- Make a simple line drawing of your image on a piece of drawing paper that is the same dimensions as your cardboard base. Focus on simple shapes.
- Cut out your paper shapes made by the outlines of your drawing, as if making a puzzle.
- Trace the paper shapes on the flat side of the corrugated cardboard and cut them out. *Cardboard is not always easy to cut through so this step may require sturdy scissors and an adults hand.
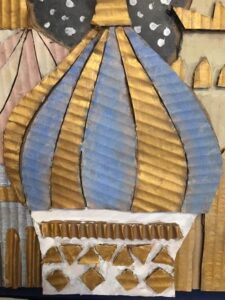
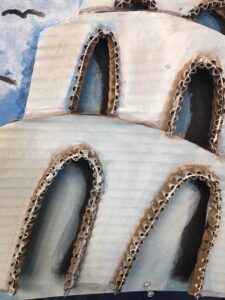
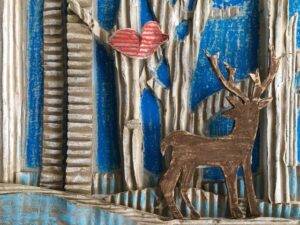
- Begin building up your relief sculpture, working from the background to the foreground, gluing the pieces down in their proper place. Small pieces of Styrofoam cut up (or squares of cardboard) work great for creating a “high relief” sculpture, meaning that it really stands out from the base. Simply place a small piece behind your cutout shape to act as a cushion, creating more depth.
- Experiment using both sides of the cardboard to create interesting textural layers. Add details using smaller cutouts.
- You may choose to paint, spray paint, or color your final piece, with crayon or oil pastel.
- Turn it into a shadow box by gluing measured strips of cardboard to the edges of your image for a clean, finished look.